Documentation
This page describes the different functions of VERICOMP and how to use them.
Registration
In order to use VERICOMP to its full extend, you will need to create an account using a verifyable email address. We are not interested in sending you newsletters or selling your user data to third parties; the user management system is only a precaution. Currently you only need an account if you want to add problems to the database.
The registration process is pretty straightforward:
- Open the registration page.
- Enter your email address.
- Enter a secure password and repeat it.
- Accept the privacy policy.
- Click the "Create Account" button.
- You should now receive a verification email. Follow the link in that email to complete the registration process.
You are now able to log in with your email addess and password in the login form in the upper right corner of the screen.
Core Concepts
WIP
The problem database
The problem database contains problems suitable for solver benchmarks.
Adding new problems
There are two options available if you want to add a problem to the existing database. You may add an IVP to an existing ODE, or submit a completely new ODE. In both cases, you have to be a registered user.
New ODE
In our database, ODEs are described by
- a unique name,
- a short description,
- its dimension,
- its class,
- optional keywords to describe it,
- the right side of the equations,
- initial conditions,
- the exact solution, also optional, and
- parameter values, if the right side contains any.
The "Name" field checks the availability of the entered name automatically in the background. If you chose a name that is already taken, the field will change its background color to red. You can only submit the problem if you entered a unique name. Use the search function on the "Problems" page to check if a name is available.
The description field has a minimum length of 16 characters and is used to specify the problem's origin and characteristics. Keywords have to be separated by semicolons and allow other users to find the problem more easily, or include it in the recommendation process. The "real life problem" checkbox is optional and can be used to indicate a real world origin of the problem at hand.
Right side and exact solution must use Python 3 syntax. For the right side, unknown values have to be called xN, with N being an index starting at 0. Parameters are identified by parN. In the exact solution, t is the independent variable, while cN are identifiers for the initial values.
Initial values and parameter values have to be separated by newlines as well. Uncertain values have to be denoted using square brackets, like for example [2.0, 3.0]. Whitespace after the comma is allowed. You may also leave out the decimal places if the interval boundaries are integers. While the use of parameters is optional, initial values are mandatory.
New IVP
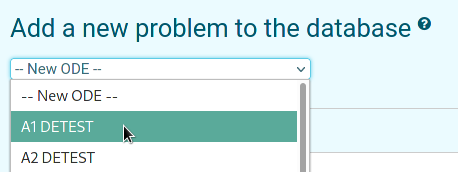
Since it may be desirable to slightly change the parameters of an existing problem, you don't have to re-submit the entire problem. In the problem form, the first input field is a drop-down menu set to "New ODE" by default. Click on the field to select an existing ODE.
After selecting a problem, the form will fill out most fields automatically, except "Initial values" and "Parameter values". Those are the fields that you can fill in yourself to add an alternative version of the problem. Changes to fields other than the aforementioned won't be submitted.
Solvers
Just like the problem database, there is also a database for solvers known to us. First, users are presented with a list of all solvers, with the solver's name and a short description in each row. Click on a row to go to the full page about the solver.
Every solver page displays the following information:
- author(s),
- link to the project website,
- short description,
- primary programming language,
- verification concepts,
- methods,
- configurable parameters,
- three default configurations and
- a list of problems already tested.
Recommender
The recommender system allows you to find the appropriate solver for a single problem or an entire class of problems. It calculates a confidence score for each solver and its settings for which there is test data available, based on the test criteria.
On the left side of the interface you can select the method by which problems should be grouped together. The option "System Classification" uses the classification described earlier. "Keywords" tries to match a few short descriptive words to the problem's metatada. So the first two options will select multiple problems most of the time. "Problem Selection", on the other hand, allows users to select exactly one problem from the database.
On the right side of the interface you can adjust the weights of the test criteria. By default, weights are distributed equally. It should be noted that the sum of weights must always equal one. Otherwise the system will adjust itself to reach the expected sum, which might result in altered results. Reset the weights to their original state with the "reset weights" button.
After clicking the "Submit" button, the options will collapse and a list of all generated recommendations will appear below. In each row you will see the rank (from highest to lowest), the confidence score, the name of the solver and settings that were used to achieve this score. Just like the lists of problems and solvers, the rows are clickable. Selecting a row will open a modal dialog displaying more information about the selected recommendation. In each dialog there are to graphics. The one on the left compares the selected recommendation with every other recommendation of the same solver. The image on the right shows the test results of the recommendation with the highest confidence score for each solver, so a direct comparison is possible.